How to Create a Craft Cabinet with a Hot $20
June 9, 2019
If you have kids in your life, you need to have things for them to do. I suggest crafts! If you don’t have children in your life, guess what I suggest? Crafts! And I’m not just saying that because I’m Mrs. Cr8.

Crafts are truly universal and everybody can do them. Don’t side-eye me! I mean it.
I think sometimes people label themselves as non-creatives because of some negative childhood art experience. Or maybe, they just never let themselves be free to create without boundaries…trying to make their art “right” or like everyone else’s. Crafting really should be a positive experience since it allows for creative expression at whatever level a person is. There’s no right or wrong way to craft!
This is why I encourage you to create a craft cabinet…drawer….or box to unleash your creativity and let the cr8joi magic begin.

How many times have you trolled Pinterest to find something fun to do, only to realize you don’t have any of the materials? You could totally do THAT you just need some pom poms, ribbon, googly eyes, and well forget it. Epic #pinterestfail before you even get started!!!
Well let’s walk through how YOU CAN create a craft cabinet for a hot $20…or bin or closet or box…whatever you have to work with!
Estimated Time: 2-3 hours
1. Make a list of the basic craft supplies.
You will need some items that you probably already have. I believe in you so much that I made you a checklist to make this project easier. Click here for my Must Have Craft Supplies by Mrs Cr8.
2. Determine where your craft cabinet/space will be.
Then…deep breath…clean it out. Don’t make it a big deal. Just get up in there and do it!
3. Round up all the found craft items and check them off the list.
Set the found craft items by the new area. While you are at it, round up any containers or bins that you can repurpose for the new craft space.
4. Take a picture of the craft supplies, containers, and the empty craft area.
You are now ready to go shopping. Don’t forget to take your shopping list!
5. Head to your nearest Dollar Tree to purchase craft supplies and containers.
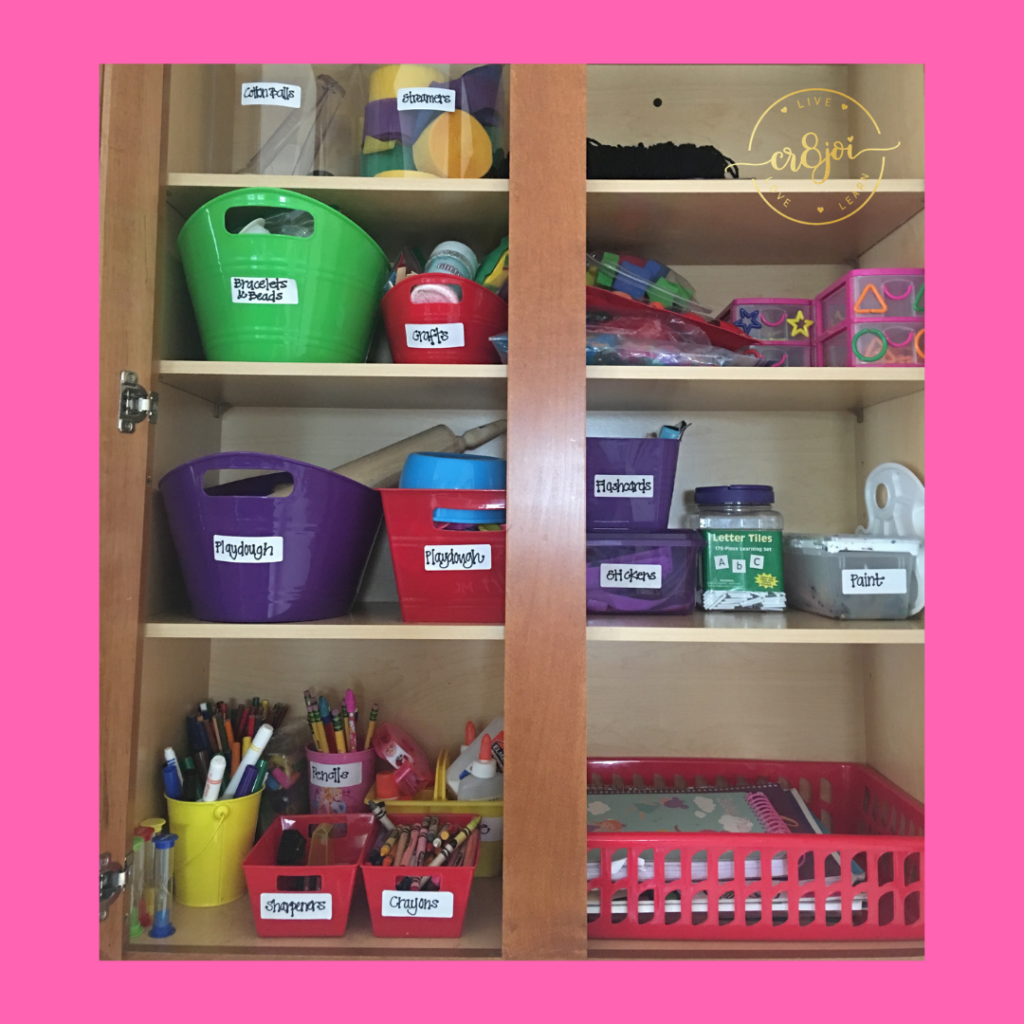
Dollar Tree is my favorite place to find inexpensive craft supplies and bins. Refer to your list and pictures as you shop, so you don’t fall off track. I have about 15 bins, in various shapes and sizes, half of which I already had. When I went to buy my containers, I tried to stick with one color, so it would look neater. (Tried is the key work here.) Buy what makes you happy and works for you! You will need to consider the amount of supplies you are trying to contain and what’s in stock for this.
6. Put everything in its home as soon as you get home.
Do not leave the supplies in a bag and the piles on the cabinet. Get the craft space completely together when you get back from the store, do yourself a favor and finish this project to completion so you don’t have a hot mess zone. Place the craft supplies in their proper containers. Take size and quantity into account. For example, rhinestones go in a small container (preferably with a lid) while, cotton balls can go in a large open bin.
7. Label the containers- by hand, with computer labels, or with a label maker.
The labeling is key because this will help others put things back where they live. I decided to label my containers by hand because I wanted to finish the project and not feel like I had a big labeling project. I take labeling too seriously sometimes! Labeling will insure that there are no crayons in the paint box, in my no more wire hangers voice!
8. Wah-Laaaaaah!!! Your craft cabinet is complete!
Now go craft some cr8joi magic!
Do you have a designated area for craft supplies? What’s in your stash? I’d love to know if you used this post to create a designated craft area.
Update:
I upgraded the craft cabinet! Click here read about the Craft Cabinet Upgrade.

I’m going to do this for my niece and nephew!! Great idea and you can’t beat the price!!
They will love crafting! Any reason to go to Dollar Tree is a great reason to me!